Captivate Your Audience Using Simple Illustrations

I started speaking at tech conferences many years ago, and slowly improved with experience. However, I felt my audiences weren’t getting that much out of my talks. My fear was they were annoyed, bored, distracted, or apathetic to the information I was giving them. They seemed to think well of me, but it did not seem I was having any meaningful impact. I had come to the depressing realization: I was a mediocre speaker.
Starting in 2015, my audiences are more engaged and entertained. People are actively listening. Afterwards, they are excited to talk to me and ask questions. They want to experiment with the ideas and technology I talk about. Even more, they are willing to take the time, weeks and months later, to tell me about the impact my talk had on them. Truth is, my speaking ability hasn’t improved that much. However, my delivery has.

Here’s the deal. I’ve come to the conclusion, as many speakers have, that the best way to teach is to tell a story. And, the best way to tell a story is to use pictures.
“A picture is worth a 1,000 words” is a big understatement. At a glance, we can glean an incredible amount of information. Our brains are like super-advanced, visual-processing machines.
Ok, let’s get one thing straight. Your audience can spot clip art and stock photos a mile away. I tried those things, and I think they do more harm than good. Plus, you can waste hours and hours trying to find the one right image to support your point, and you may never find it. In the end, you give up or, worse, you compromise your message to fit the picture you have.
Another thing, memes and animated GIFs are a cheap trick. They are good for a few laughs. Your audience might like you. But you’ll be like that funny commercial everyone’s talking about, but no one quite remembers the company or even the point of the commercial. Eliminate the memes and GIFs, or at least only use them for special cases.
Locally-Sourced, Hand-Drawn, Artisanal Slides
The pictures that are most effective are simple, hand-drawn illustrations. This is what I’ve been experimenting with in my presentations. So far, the response has been overwhelmingly positive.
The 5 benefits of hand-drawn illustrations:
- Your illustrations make your talk unique, personal, and memorable.
- The audience will look forward to each slide, with anticipation.
- Positive energy and feedback from the audience will stoke your fire.
- Your illustrations will be an exact match to your story, resulting in a clear message.
- Your illustrations will help you to remember your message, so you can deliver it with ease and with confidence.
Let’s talk about benefit #5. Remember taking notes in school? When you looked over your notes, you could remember those facts, and probably recall much more detail than you wrote down.
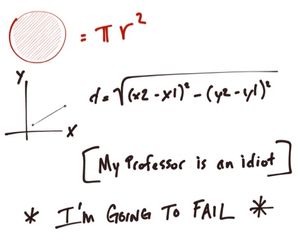
There’s something about the physical act of writing down information that helps commit thoughts to memory.
As I would draw an illustration for a talk, I would be thinking about all the things I wanted to say for that slide. To my amazement, when it came time to give my presentation, I had no trouble at all recalling the things I wanted to tell my audience! No speaker notes required!!

You may be thinking, “I can’t draw.”
I bet you can. You may not know it yet, but you can. All you need are lines, “blobs,” and simple shapes, like squares, triangles, and circles. I know you can draw those things.
When you combine these basic elements together, you can express far more than you realize.
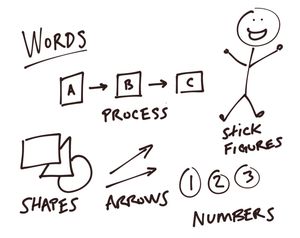
“But, my drawings look terrible.”
Give it time. Practice, and experiment. It’s a skill that can be learned and improved like any other. I’m convinced even “terrible” drawings will hold people’s attention better than anything else, and they will love you for them.
If you still aren’t convinced, check out Dan Roam’s Napkin Academy or one of his books. My personal favorite is Show & Tell. Dan can teach you all you need to know to turn your ideas into extremely powerful visualizations using the most simple drawing techniques.
Getting Started
There are lots of ways to get started with hand-drawn illustrations.
You can start sketching with a few colored pens or markers on paper. Think of a topic, and practice drawing shapes, arrows, and stick figures. If you have young kids, nieces, nephews, or grandkids, ask them to draw with you! You’ll be inspired and have a great time.
Another option is to get a dry erase lapboard and a few dry erase markers. This solution has the advantage of being able to easily erase mistakes, or start over.
When you finish with one drawing, take a snapshot with a digital camera or a phone. Better yet, if you have a smartphone, get a good scanner app. These apps already know how to make good-looking images from your phone’s camera, and usually have options for sharing those images so you can use them right away.
Leveling Up
Want to start drawing digitally? Some of the advantages are the ability to save your work and edit drawings later, “undo” mistakes, use different kinds of virtual brushes for effects, and include other tools that can help you make better illustrations.
There are many options for digital drawing. There are touchscreen tablet PCs, the Microsoft Surface/Pro/Book, drawing tablets that connect to a laptop or desktop computer, the iPad and iPad Pro + Apple Pencil, and many others.
Onions have layers, Ogres have layers!
One of the most important features of any drawing app should be that it supports “layers.” Think of layers as a stack of transparent paper. You can draw an outline on the top layer, and then add color and detail on the layer underneath without overwriting or making changes to the outline. You can rearrange layers, merge layers together, or freely experiment on one layer and delete it without affecting the rest of your drawing.
What I Use
I started out with an iPad, a cheap $5 rubber-tipped stylus, and Sketches Pro.
Sketches Pro works great for simple illustrations, it’s not hard to learn, and it has good set of pencils, pens, and brushes to choose from. If you would like to see an example of illustrations I created with this combination, check out How Kanban Can Help Your Team.
I’m currently using an iPad Pro, Apple Pencil, and Sketches Pro.
The Apple Pencil is extraordinary. The Pencil has fantastic precision, pressure sensitivity, and palm rejection (you won’t accidentally draw with side of your hand). It is a far more natural drawing experience.
Note: If you want to learn about other drawing devices and software, Brad Colbow, a professional illustrator, has posted lots of great reviews and comparisons on his YouTube channel.
Let me explain. No, there is too much. Let me sum up.
I hope this post inspires you to start your drawing journey. It’s fun. It’s addicting. And your audience, big or small, will love you.
P.S. If you need further evidence, go read Jeremy Clark's post “Becoming a Social Developer” at NDC Oslo, and watch the video of his presentation!
